This is my second iteration of the previous design. I made a few minor modifications to the original that I think came out better. I’ve noted down things I learned in bold during the process that I can improve on next time.
Prep
I first sketched out some very very rough ideas of how I wanted it to look. Next, I expanded on the sketch with some rough dimensions.

To get an idea of what the dimensions would look like, I accurately sketched all the parts on graph paper and put them together into a mockup. That dictated where space could be added or cut down.
With the final notes I created a template in LibreCAD. I printed it out and pasted it to cardboard which I cut to correct dimensions. This makes the template easier to use on leather. Of course I thought of some last minute changes which I made on the fly while cutting out the template.
For the outer leather I used Dollaro, and for the liner I used veg tanned Kangaroo leather. Using painters tape I stuck the template to the leather, and carefully, with a new blade, cut out the parts, avoiding any obvious blemishes. The tape prevents the template from moving, and isn’t too tacky so it doesn’t mar the finish on the leather.

Pattern pieces stuck to leather with painters tape
Assembly
With all the pieces cut out, it was time for assembly. I should have allowed for at least 5mm trim allowance to make glue up and flush edges easier. What helped me immensely was writing down the order of operations prior to cutting any leather. This pointed out where I might need to complete a step before starting on the next, where a piece might become inaccessible so the edge finishing needed to be done at an earlier step, all those sorts of things.

Internal bits cut out to exact size
Here’s my order of operations:
Card slot
Crease card slot tops, and edge finish. These will become inaccessible once attached to the backing that makes the card bank.
My trials with hot creasing were good, but I think I let it heat for too long, and I ended up melting some of the finish while creasing this areaStitch card slots to the backing. I only stitched the center and the top which I didn’t want to attach to the zip pocket. I wanted to leave an opening where boarding passes might be slotted in
Gusset
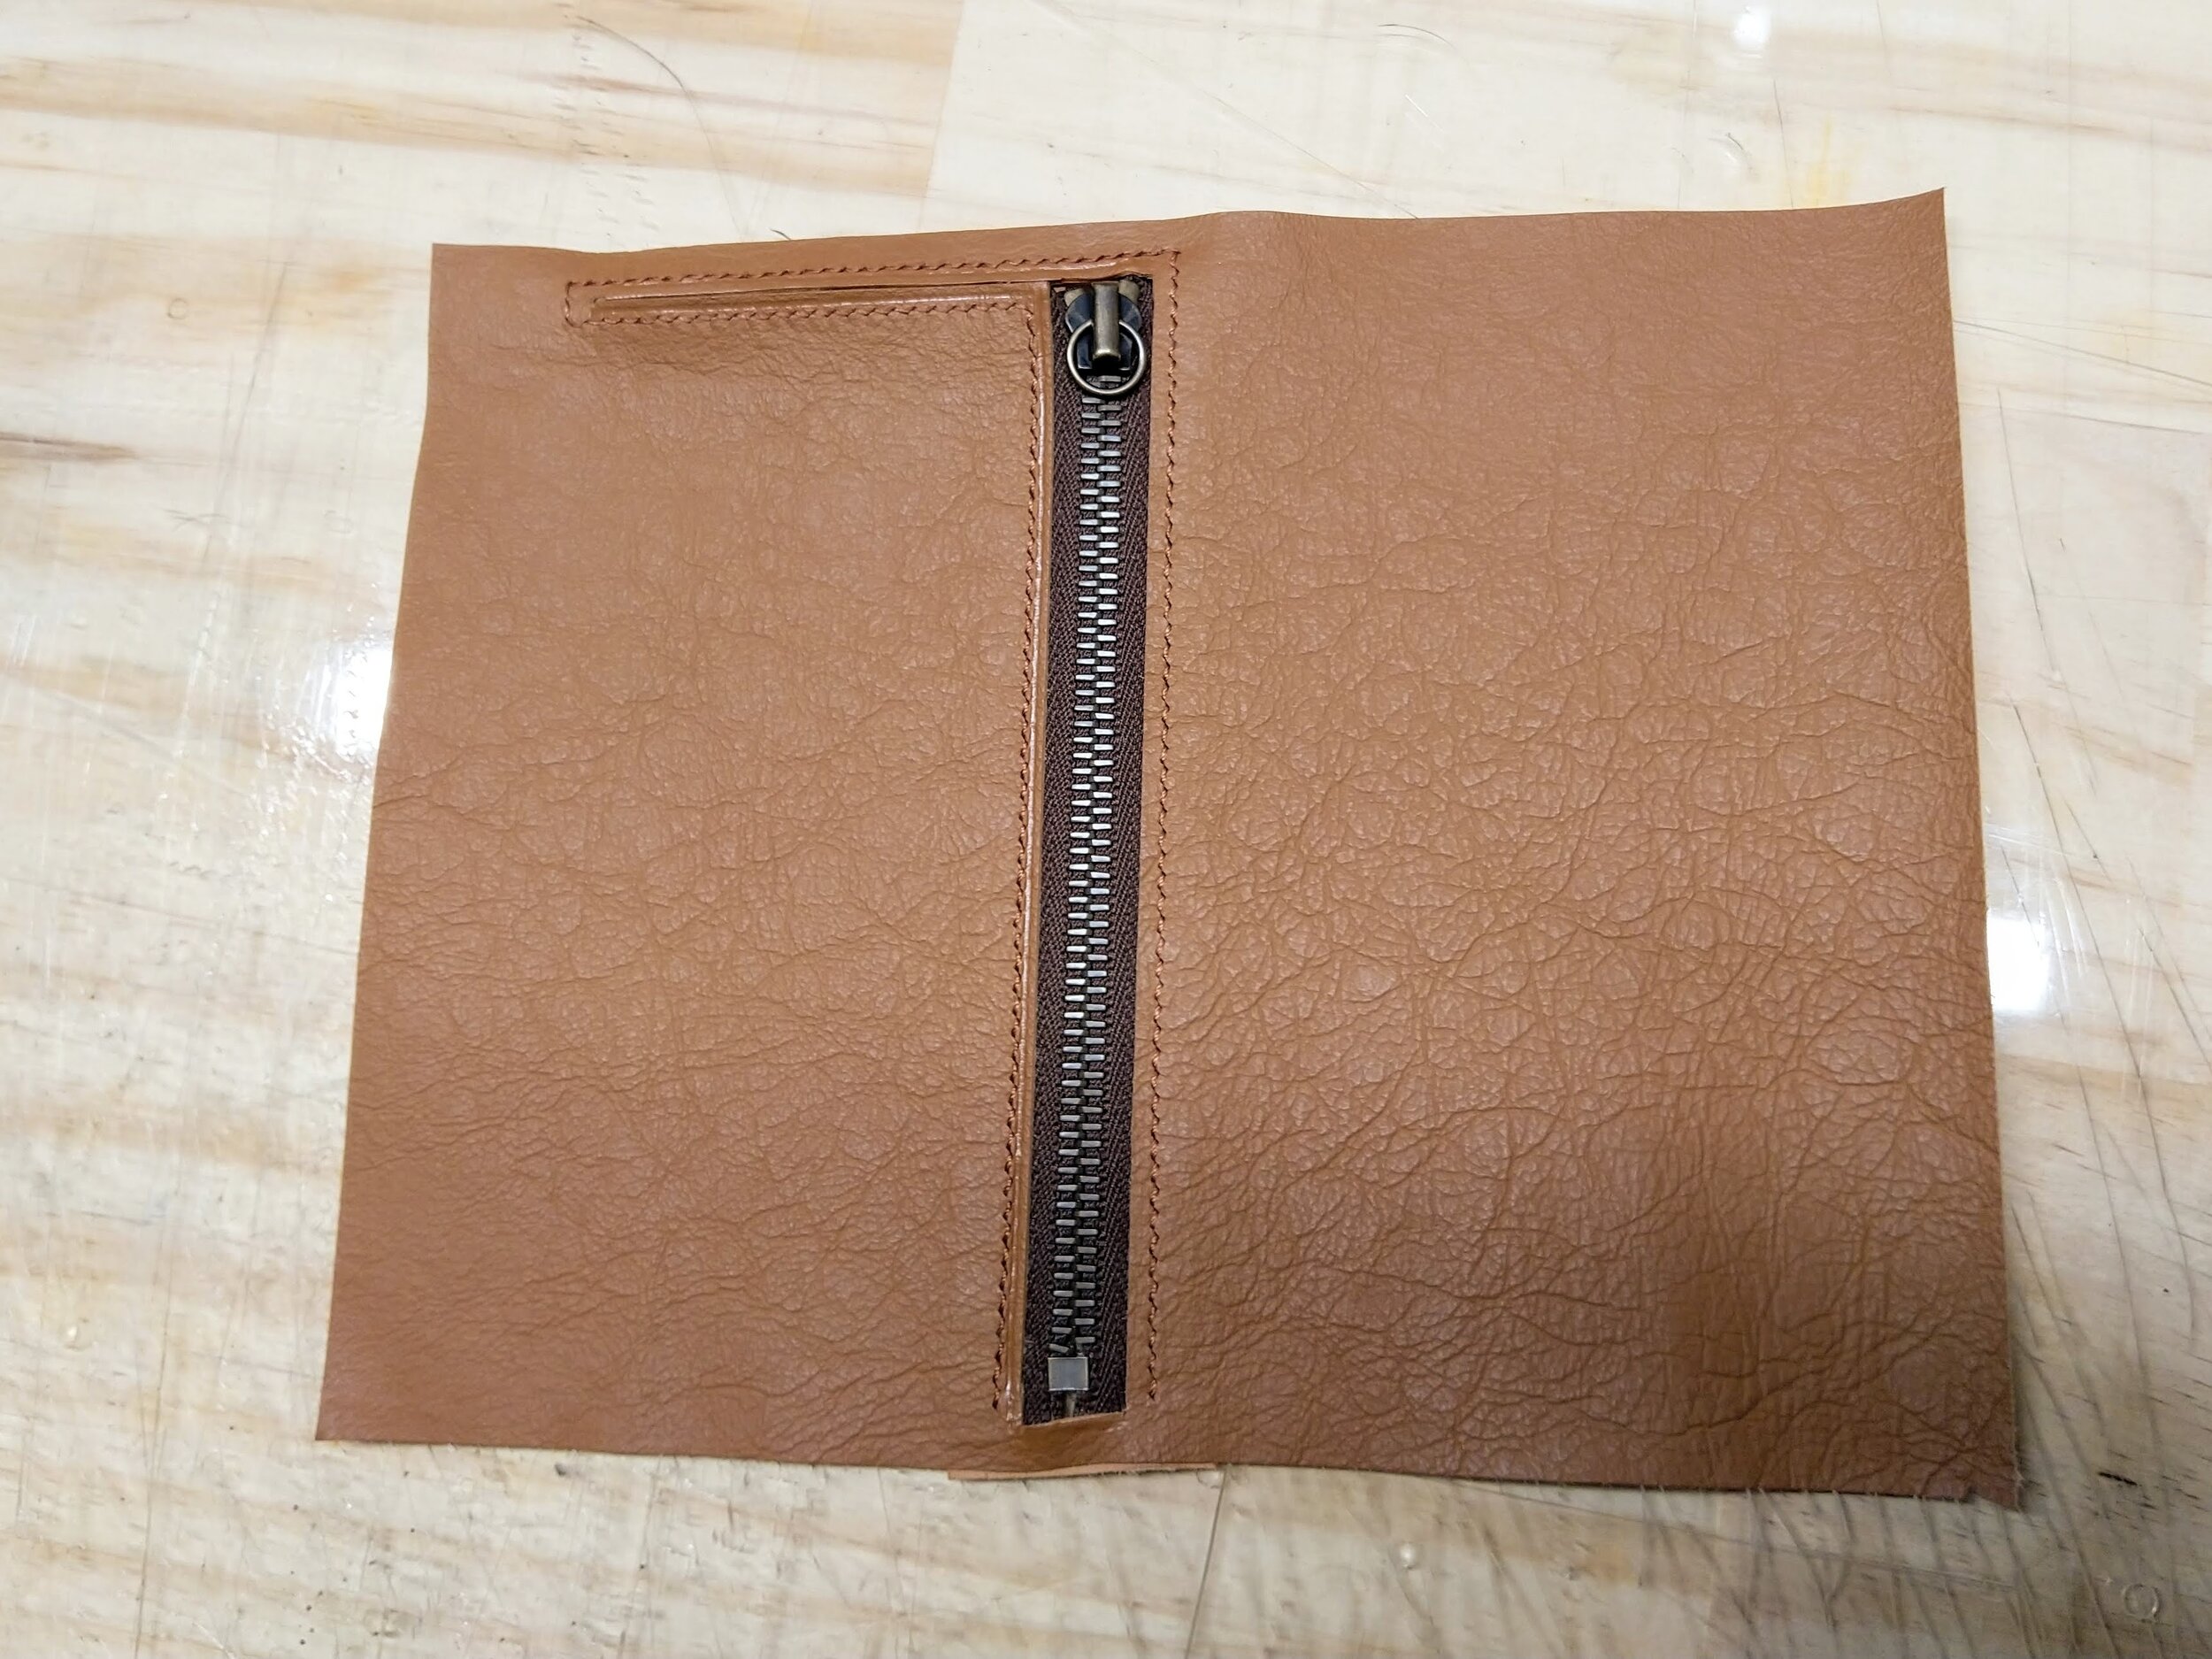
Skive all the edges of the zip pocket
Cut zip hole
I should have placed this zip hole a little lower. I had to work with very tight tolerances. A bit more room would have made it more aesthetically pleasingSkive gusset
Cut zip to size and finish the ends
Make and attach zipper pull
Skive zip placket backing
Crease zip hole
Stitch zip sandwiched between pocket and placket
Stitch gusset to pocket opening, then glue and stitch other end of gusset to pocket body
I knew I had to do it this way, but my mind wandered and I glued it all. Then came the fun part of stitching the gusset to the pocket opening
Left pocket. Zip and gusset stitched
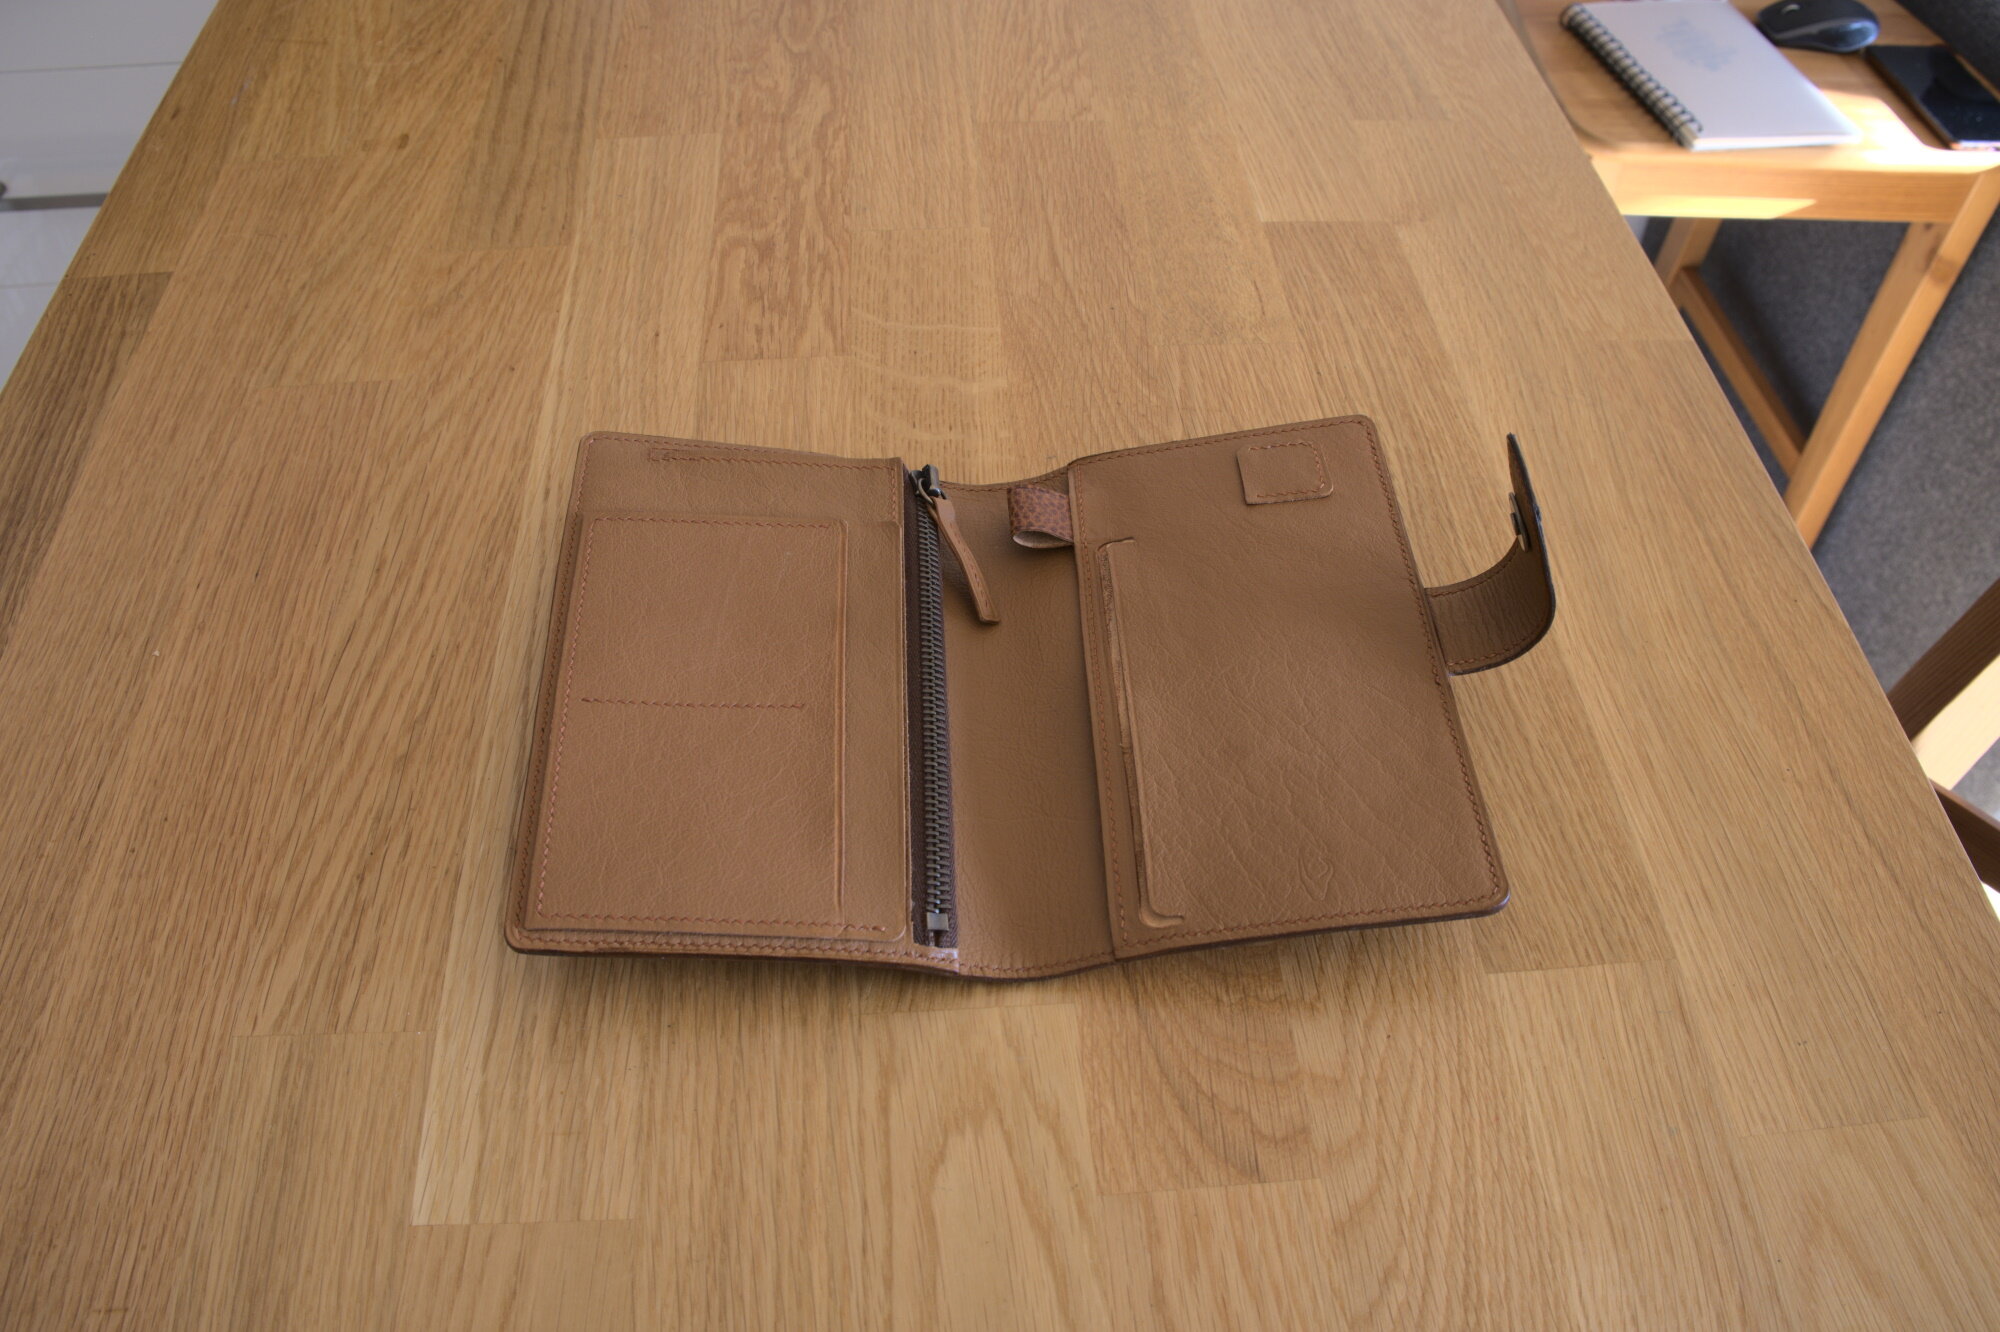
3. Stitch card bank to zip pocket
4. Fold zip pocket in half and glue edges
5. Cut tranche for right pocket. Crease it
The radius I used was very difficult to crease. Going slowly and not putting much pressure helped get around the tight curves a lot easier without mashing the creases
6. Prep sim card pocket and stitch it to the right panel
I initially made this into a little tranche style pocket with a tab to help pull the sim card out, but it was cumbersome to use, and bulky too, so I removed it and replaced it with a simple slip pocket
7. Cut pen loop with allowance for stitching. Crease pen loop
8. Glue up the layers of the right tranche and its backing at the edges
It would be helpful to mark the glue line prior to gluing so that it doesn’t show through from the tranche gap
Sandwich the pen loop between the layers and stitch
9. With most of the major assembly done, if you’re going to stamp a logo, do it now. I put mine on the right tranche side
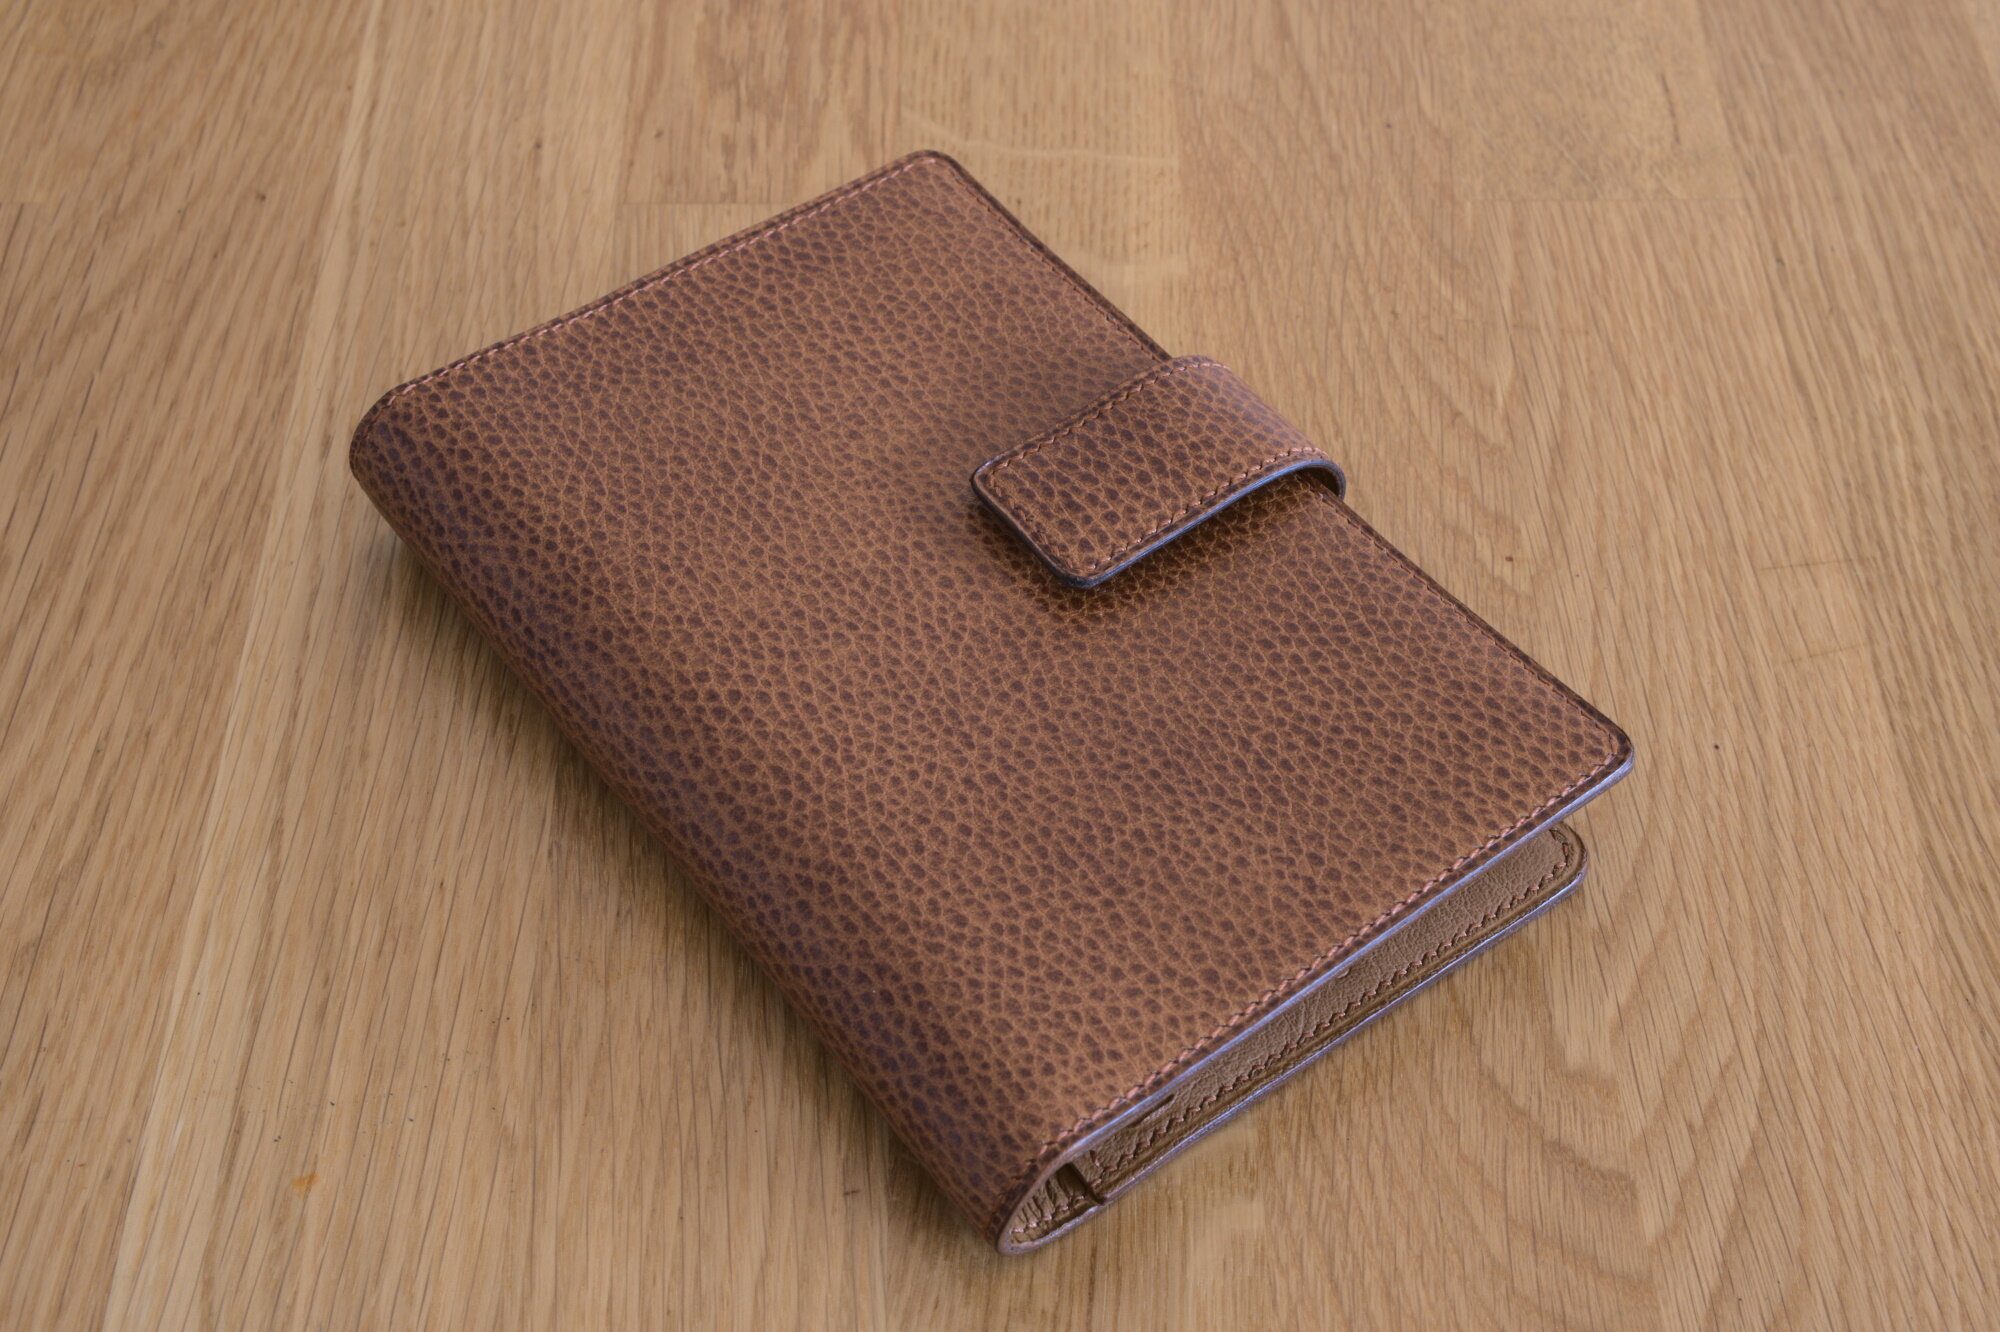
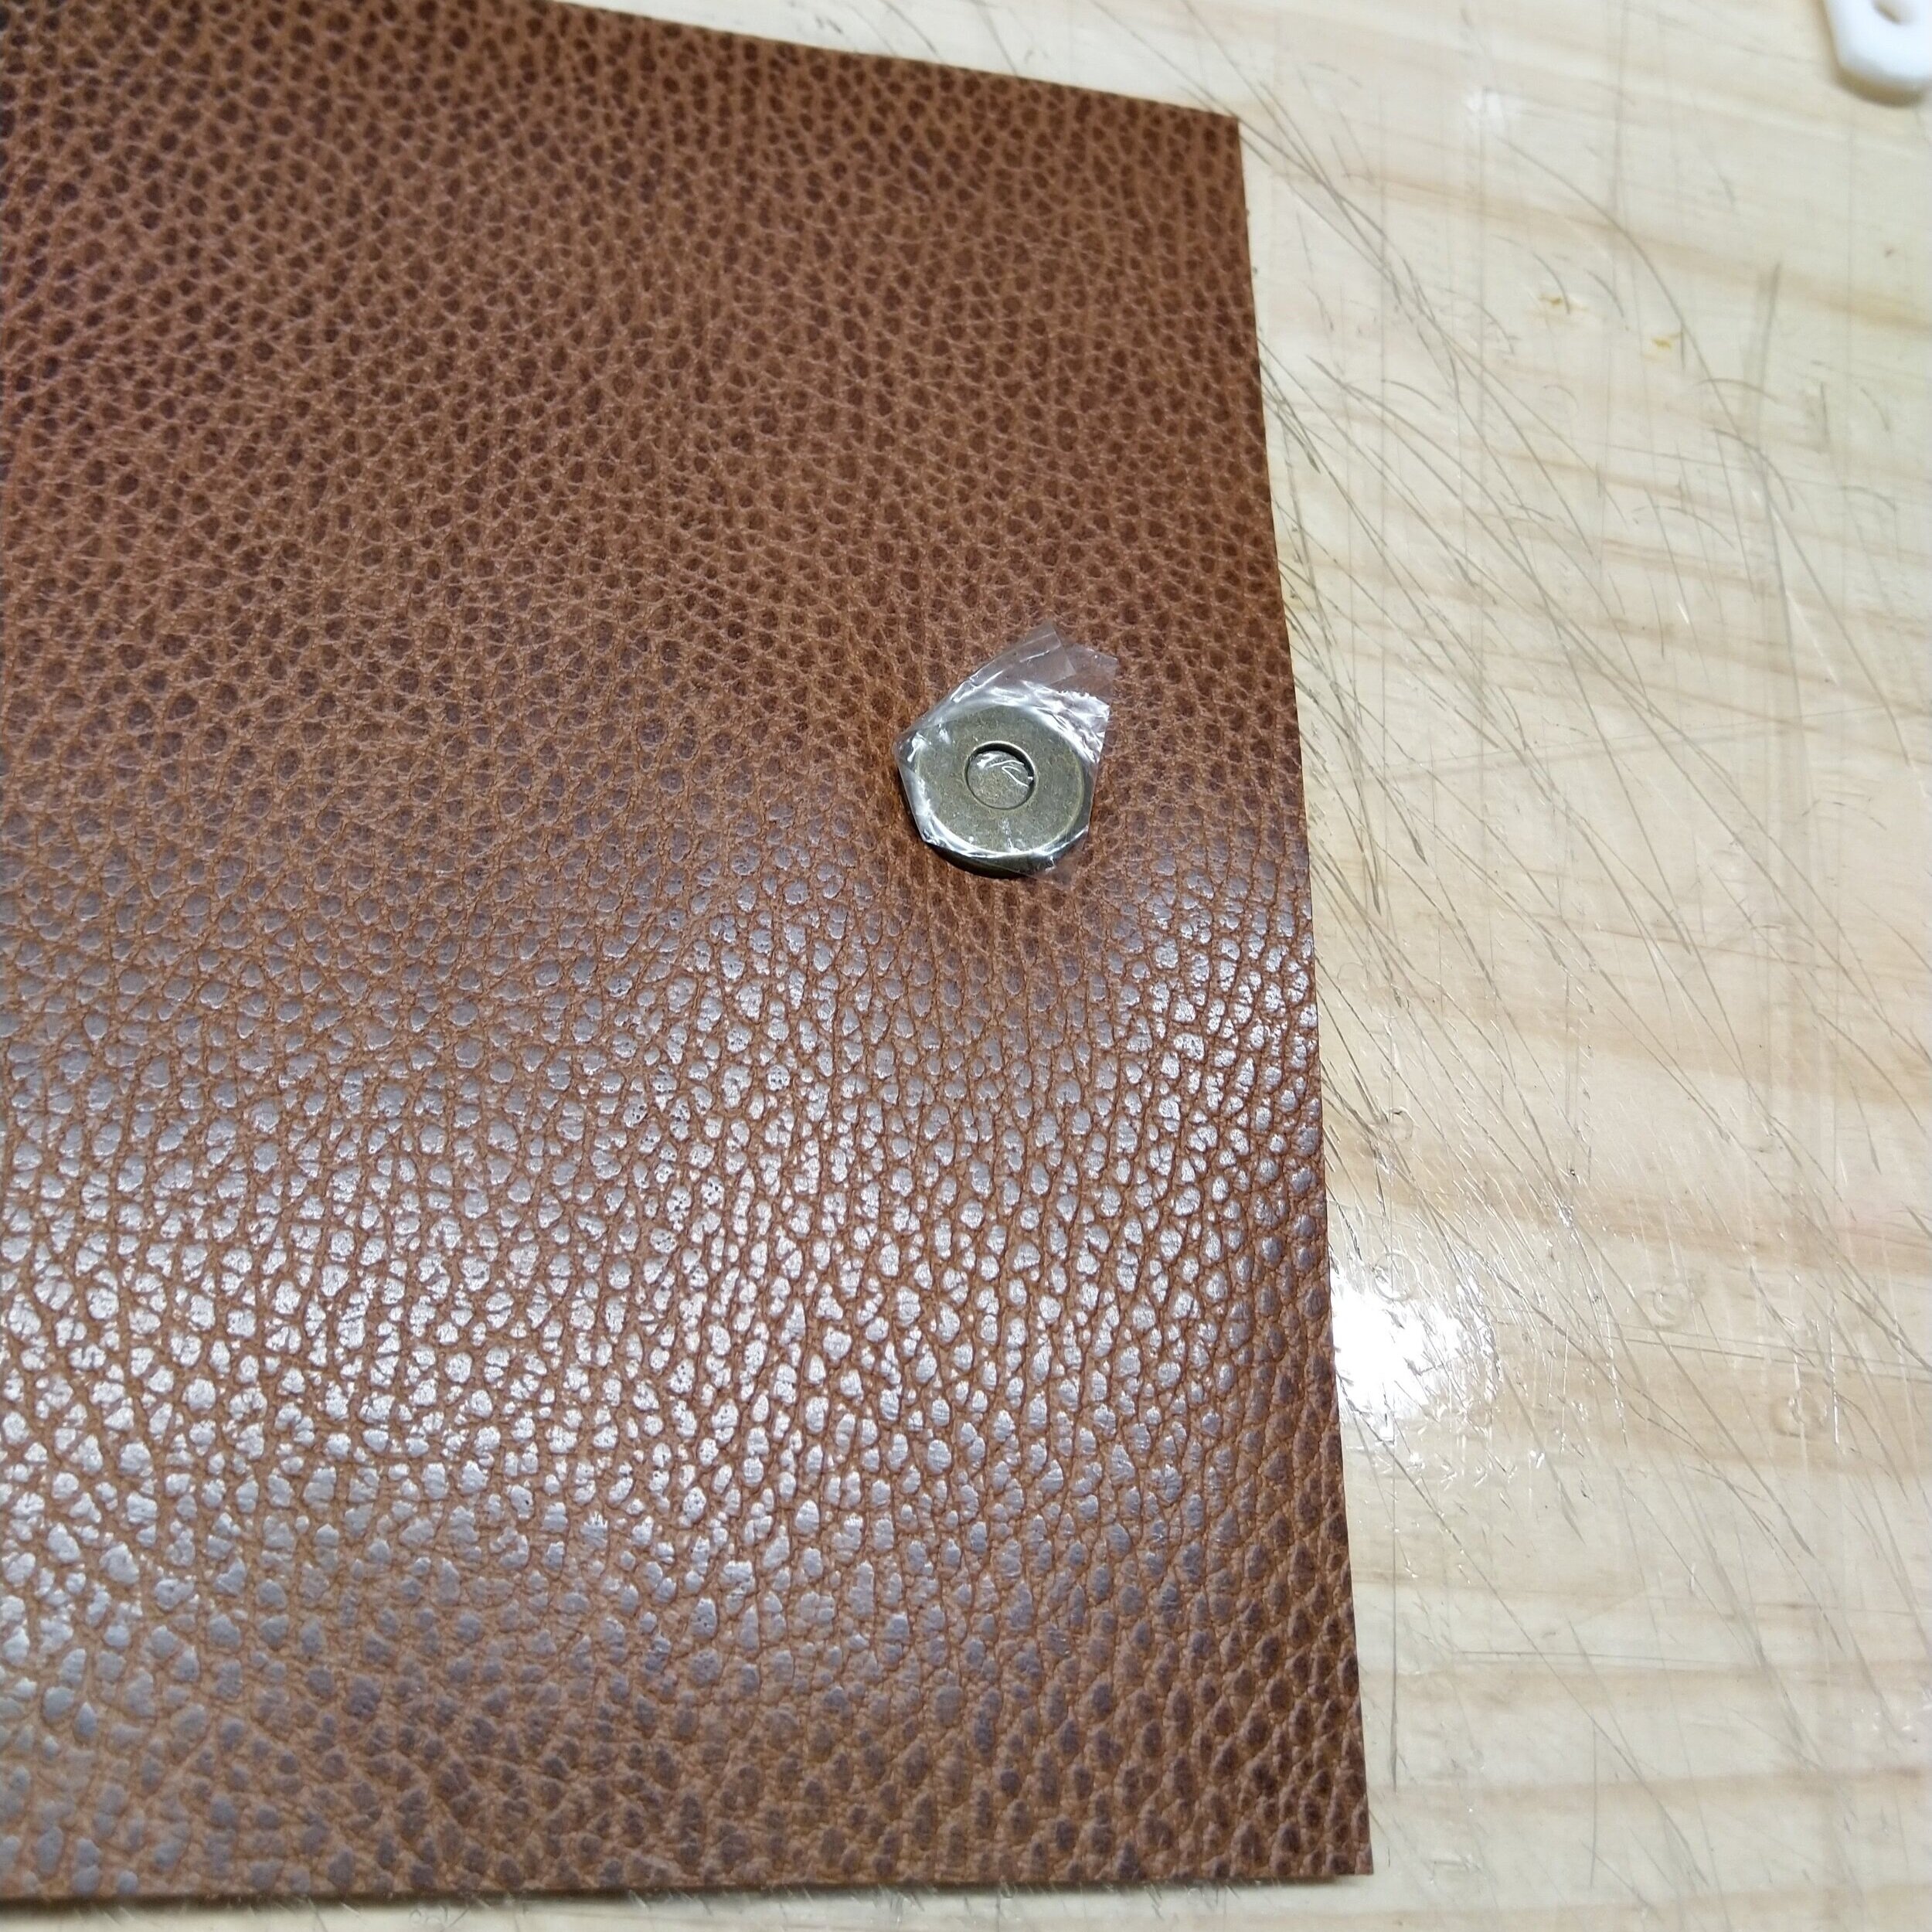
10. Make the closure strap
I used magnets, but you can use snaps, maybe even cover the snap, or pick any closure you like
I kept the theme going with the dollaro outer, microfibra reinforcement, and kangaroo liner
Knowing the correct length to make it is important, so take your time with this. I roughly put all my pieces in place where they would be, stuffed them with all the items that the wallet would carry to get a idea of the thickness the strap would need to accommodate for
Stitch up the edges of the strap
Edge finish the strap. I chose to burnish. You can paint the edges instead

Attach mechanism to liner

Glue reinforcement

Glue on curve to outer
Mechanism attached to outer
11. Using the liner as a guide, on a curve mark the outer leather’s final length
Cut reinforcement 5mm shorter on all sides
Attach the other end of the closure to the outer leather
12. Skive outer leather, reinforcement, and liner

Liner about to be glued on curve
Fully laminate the reinforcement to the outer
Glue the edges of the liner to the outer on a curve
If your plan is to attach the closure strap between the outer and liner, do it now. I forgot, and had to sandwich it between the liner and the right pocket

Outer and Liner glued on a curve
13. Glue the left and right assembled sides to the liner
Rough the edges where the glue will be applied. If using PVA-type glue like Aquilim315 make sure you allow enough time for the glue to get tacky before you stick things so you don’t get unsightly glue lines at the edges from seepage
Sandwich the closure here if you didn’t do it before. Be sure to get it exactly at the center. One way is to close the mechanism shut and make sure the strap is level. Then mark the position and glue it
Hammer all the glued lines to ensure good adherence
14. With everything stuck into place, it’s time to trim off any excess and make sure the edges are flush
This is where cutting the liner slightly oversize would have come in really handy
15. Final shape
Cut the corner radii if you’re planning to round them off
Make sure the edges are perfectly flat. Sand them if need be
16. Stitching
Mark the stitching line. I mark the line at 2.5mm from the edge
Punch your stitching holes. I align my french irons to the inside of the line. This makes the rough centre of the holes 3mm from the edge, which is a nice spacing
Hammer the holes closed a bit. This allows the stitches to lay with a better slant
Stitch all the way around
Hammer the stitches
17. Edge finish
Make sure the edges are smooth again. Go over them with a planer and/or sandpaper
Crease all the edges
Edge paint or burnish