Weekender and Prototype
This was by far the most ambitious project I’ve undertaken. I took a lot of learnings from the usable prototype toiletries bag I made. My approach to creating this bag was a little haphazard, so I’ll try to streamline it a bit for my future self who will undoubtably refer to this post because my memory is so awful.
Prep
Leather used was Black Premium Bit Shrink and Peach Fuwari from Hashimoto. Reinforcement used was Microfibra 1mm, Brio 0.7mm, and non-stretch reinforcement tape on all seams.
Cutting
Panels cut from Black:
4x D-panels (they’re shaped like a D, don’t know what else to call them)
2x Side panels
1x Base
Various straps and piping
Panels cut from Peach:
2x middle panels
1x giant inner liner
Various straps and piping
Reinforcement:
1mm Microfibra sized to D-panels and trimmed a bit on all edges
0.7mm Brio for the base
2mm Oslo for quilting
Skiving
Seam allowance for this bag was 1cm, so I feather-skived 1cm where needed (in hindsight I should’ve gone double the seam allowance):
D-panels
Curved edges where it would attach to side panels
Bottom where it would attach to the base
Side where it would attach to the middle peach panel
Side panels
All around the curve and base
Base
All the way around
Strips for handle attachment
Just the two long edges, these I step-skived, leaving a jump where the O ring would sit at full thickness
Build steps
Quilting
The toughest part first, I pricked the peach middle panels. I laminated the Oslo to it, leaving a gap at the top and bottom where they would be stitched to the zip and base respectively. No point having bulk there. I backed the piece with some split. I could’ve used salpa or another piece of leather, anything works. Then I got to quilting it. I planned my start and end points so I’d start cleanly at the top visible areas, and terminate the stitching with a hidden backstitch somewhere towards the bottom.

Quilted panels
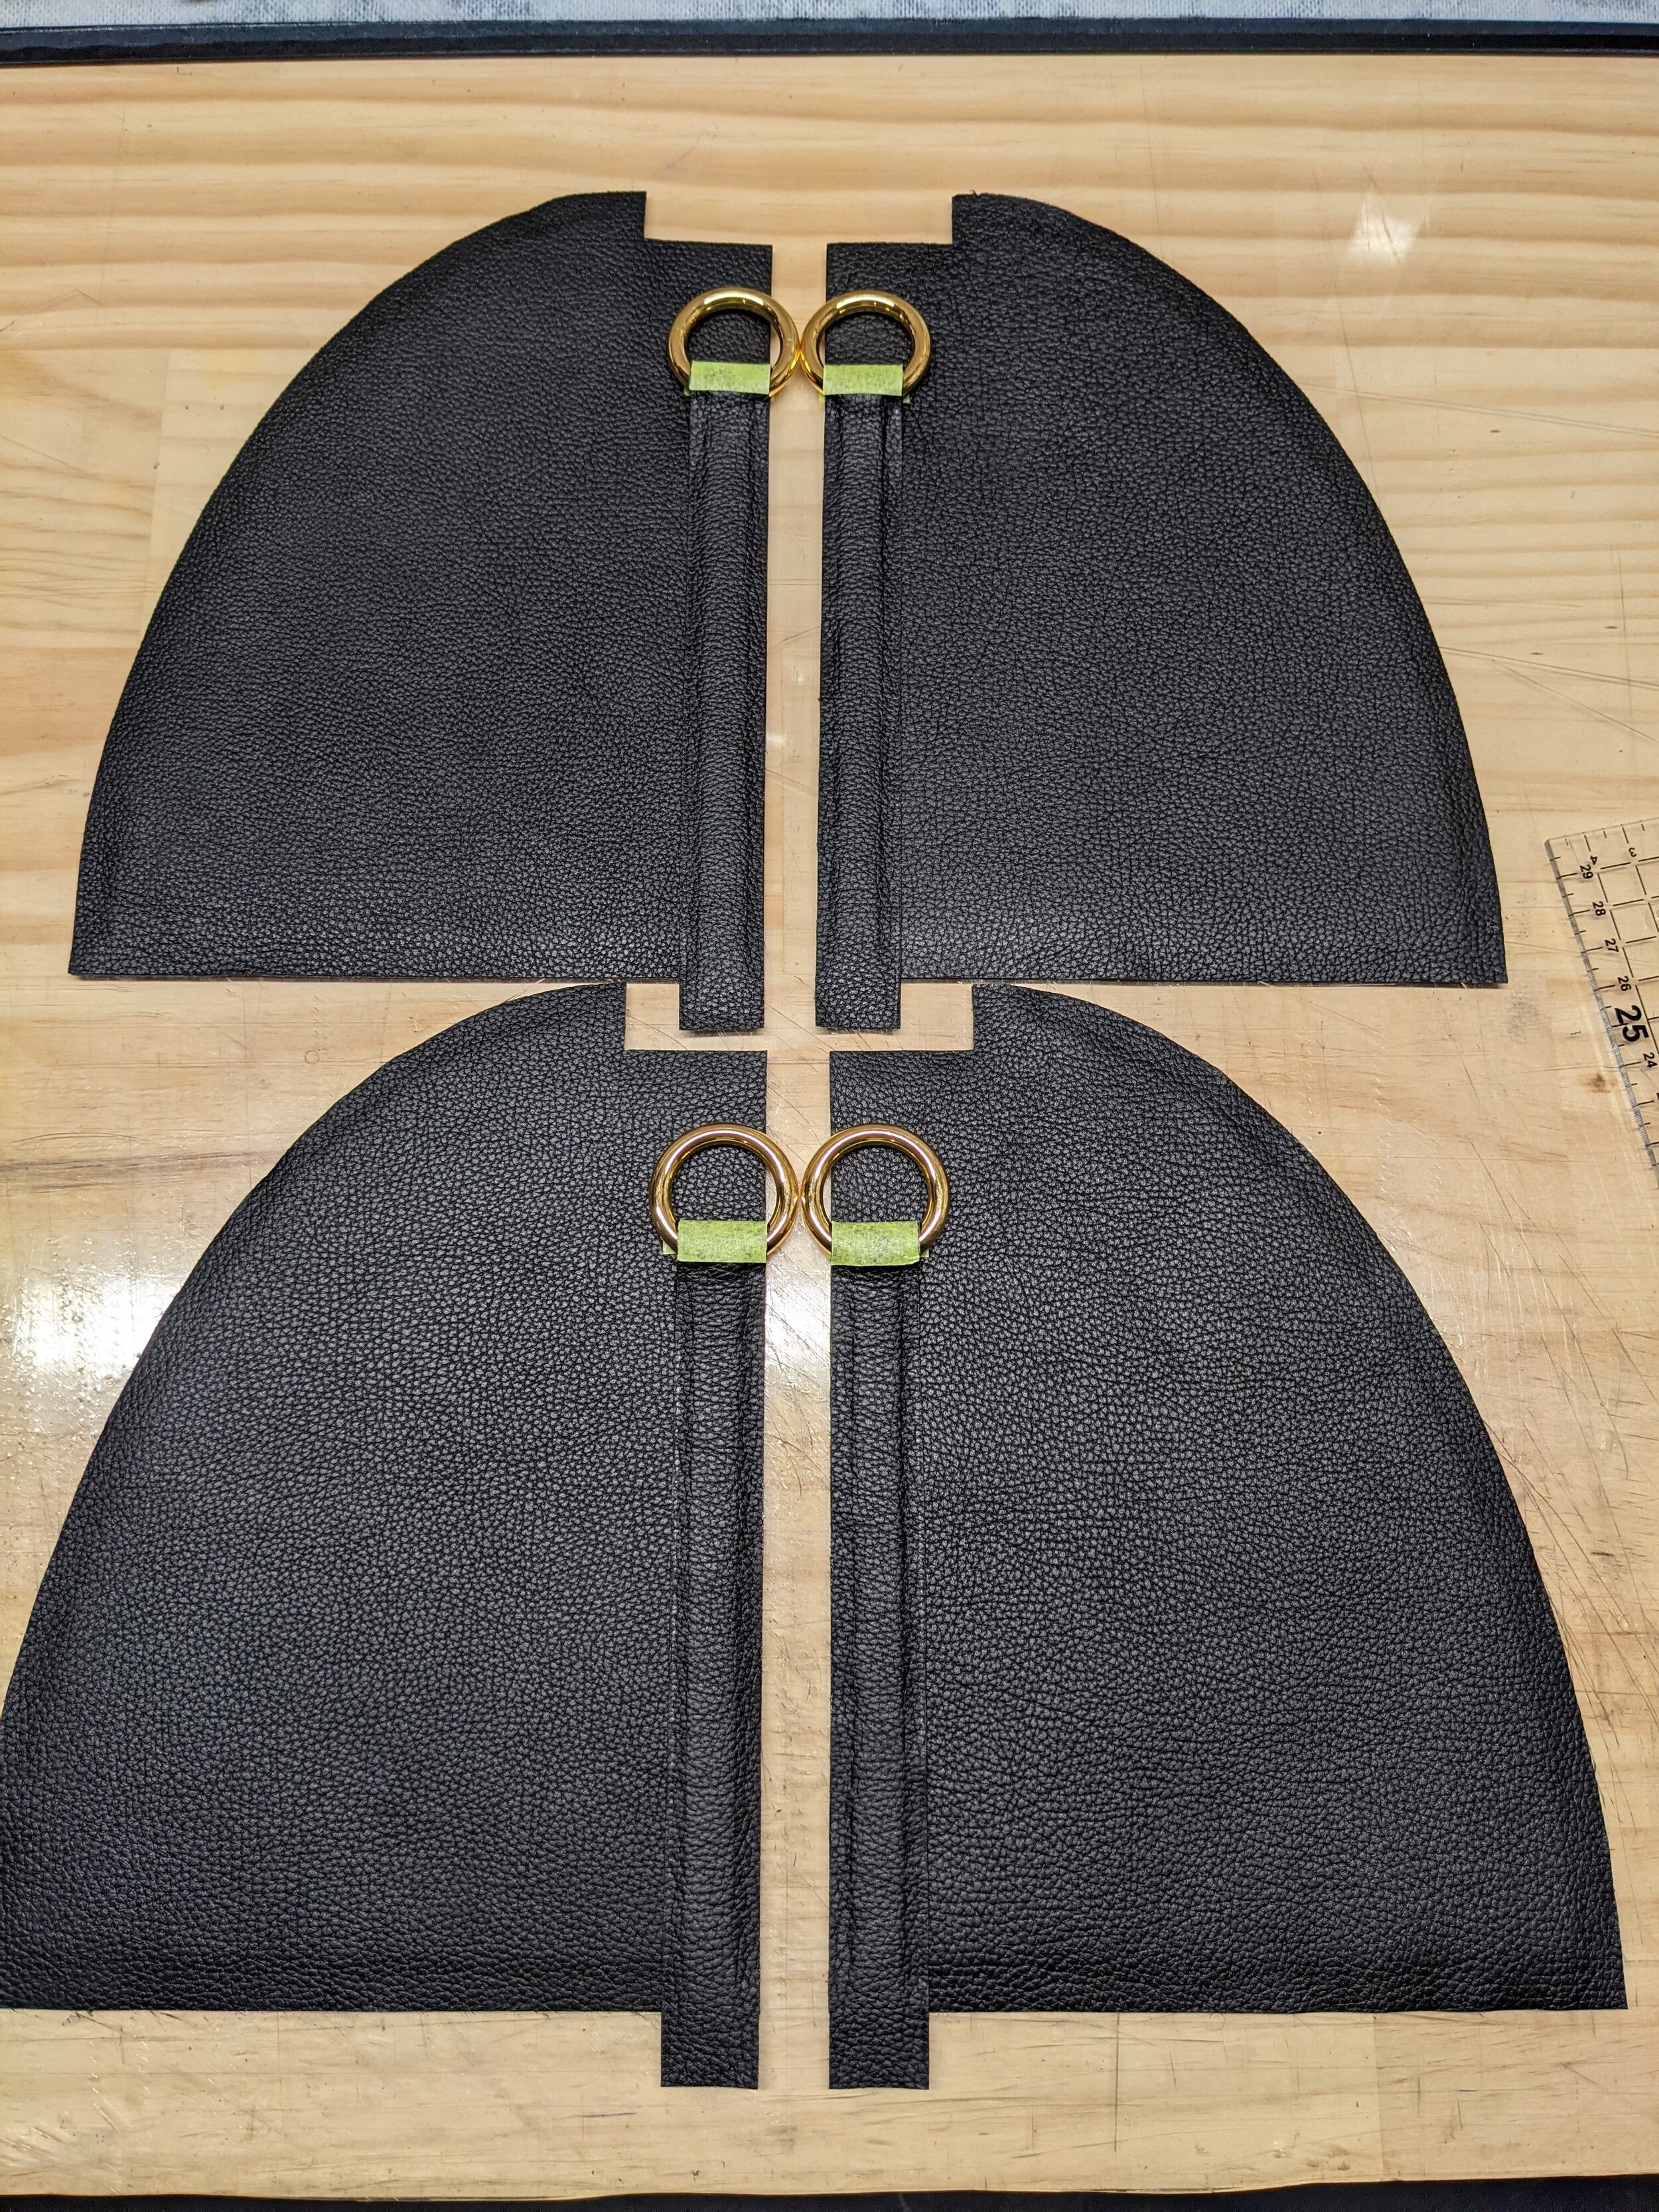
D-panels
I laminated the reinforcement to the outer leather. These panels would carry the strip enchapes (I have no idea if this is correct terminology, the strips either side of the middle panel that the carry handle would attach to), so I needed to prep the strips.

Dry-fitting panels to get rough strip length

Gluing O-rings in strip enchapes
I covered the under surface of the strips with reinforcement tape to prevent any stretch. I pricked, creased and edge painted the strips. I added a bit of padding on the under side. Then I glued the strips to the D-panels, pricked all the way through, and stitched the strips down. Being black leather I stitched the edge that would be attached to the quilting panel with a contrast thread (this is a temporary stitch). Next I sanded and re-painted the edge that would be attached to the quilting panel. Once dry I removed the temporary stitching.

Gluing strip enchape to D-panel

Temporary stitching
Strip enchapes stitched at one edge, painted at the other
I glued the D-panels to the quilting panel, making sure the total bottom length was equal to the base length to which it would be stitched. Things skew and nothing ever really goes perfectly to plan, so it’s always necessary to leave fudging room.
Side panels
Another very tricky, and completely winged process was the shoe pocket in one of the side panels. How I roughly tackled it was this:
I cut out the hole in the main leather and liner
I cut out another black main leather in the same hole shape so I could line the first piece
I constructed the shoe pocket out of fabric (upholstery canvas)
I stitched the pocket to the liner around the perimeter of the hole
I prepped a zipper strip longer than the opening I wanted, and glued and stitched it to some leather strips
On the main side panel with a hole I glued the zipper strip into place, the other half glued to the offcut from the hole
I stitched everything into place and lined the main hole cut piece to give it a nice clean look
I glued side panel and their liners at the very edges

Fabric pocket
Fabric sewn to liner
Zipper pinned to outer side panel

Zipper pinned to side panel flap

Front view of zipper pinned to flap

Side panel zip construction complete

Shoe pocket complete
After this stressful bit of construction I noticed that the pocket was a bit warped at the edges. This is as a result of the liner being warped, which I think is a result of my messing up the direction in which I sewed the fabric pocket in.
I honestly have no idea how to fix this for next time besides reinforcing the liner with velodon antistretch reinforcement.
My fingers are crossed that during the piping stage all these wrinkles will disappear.
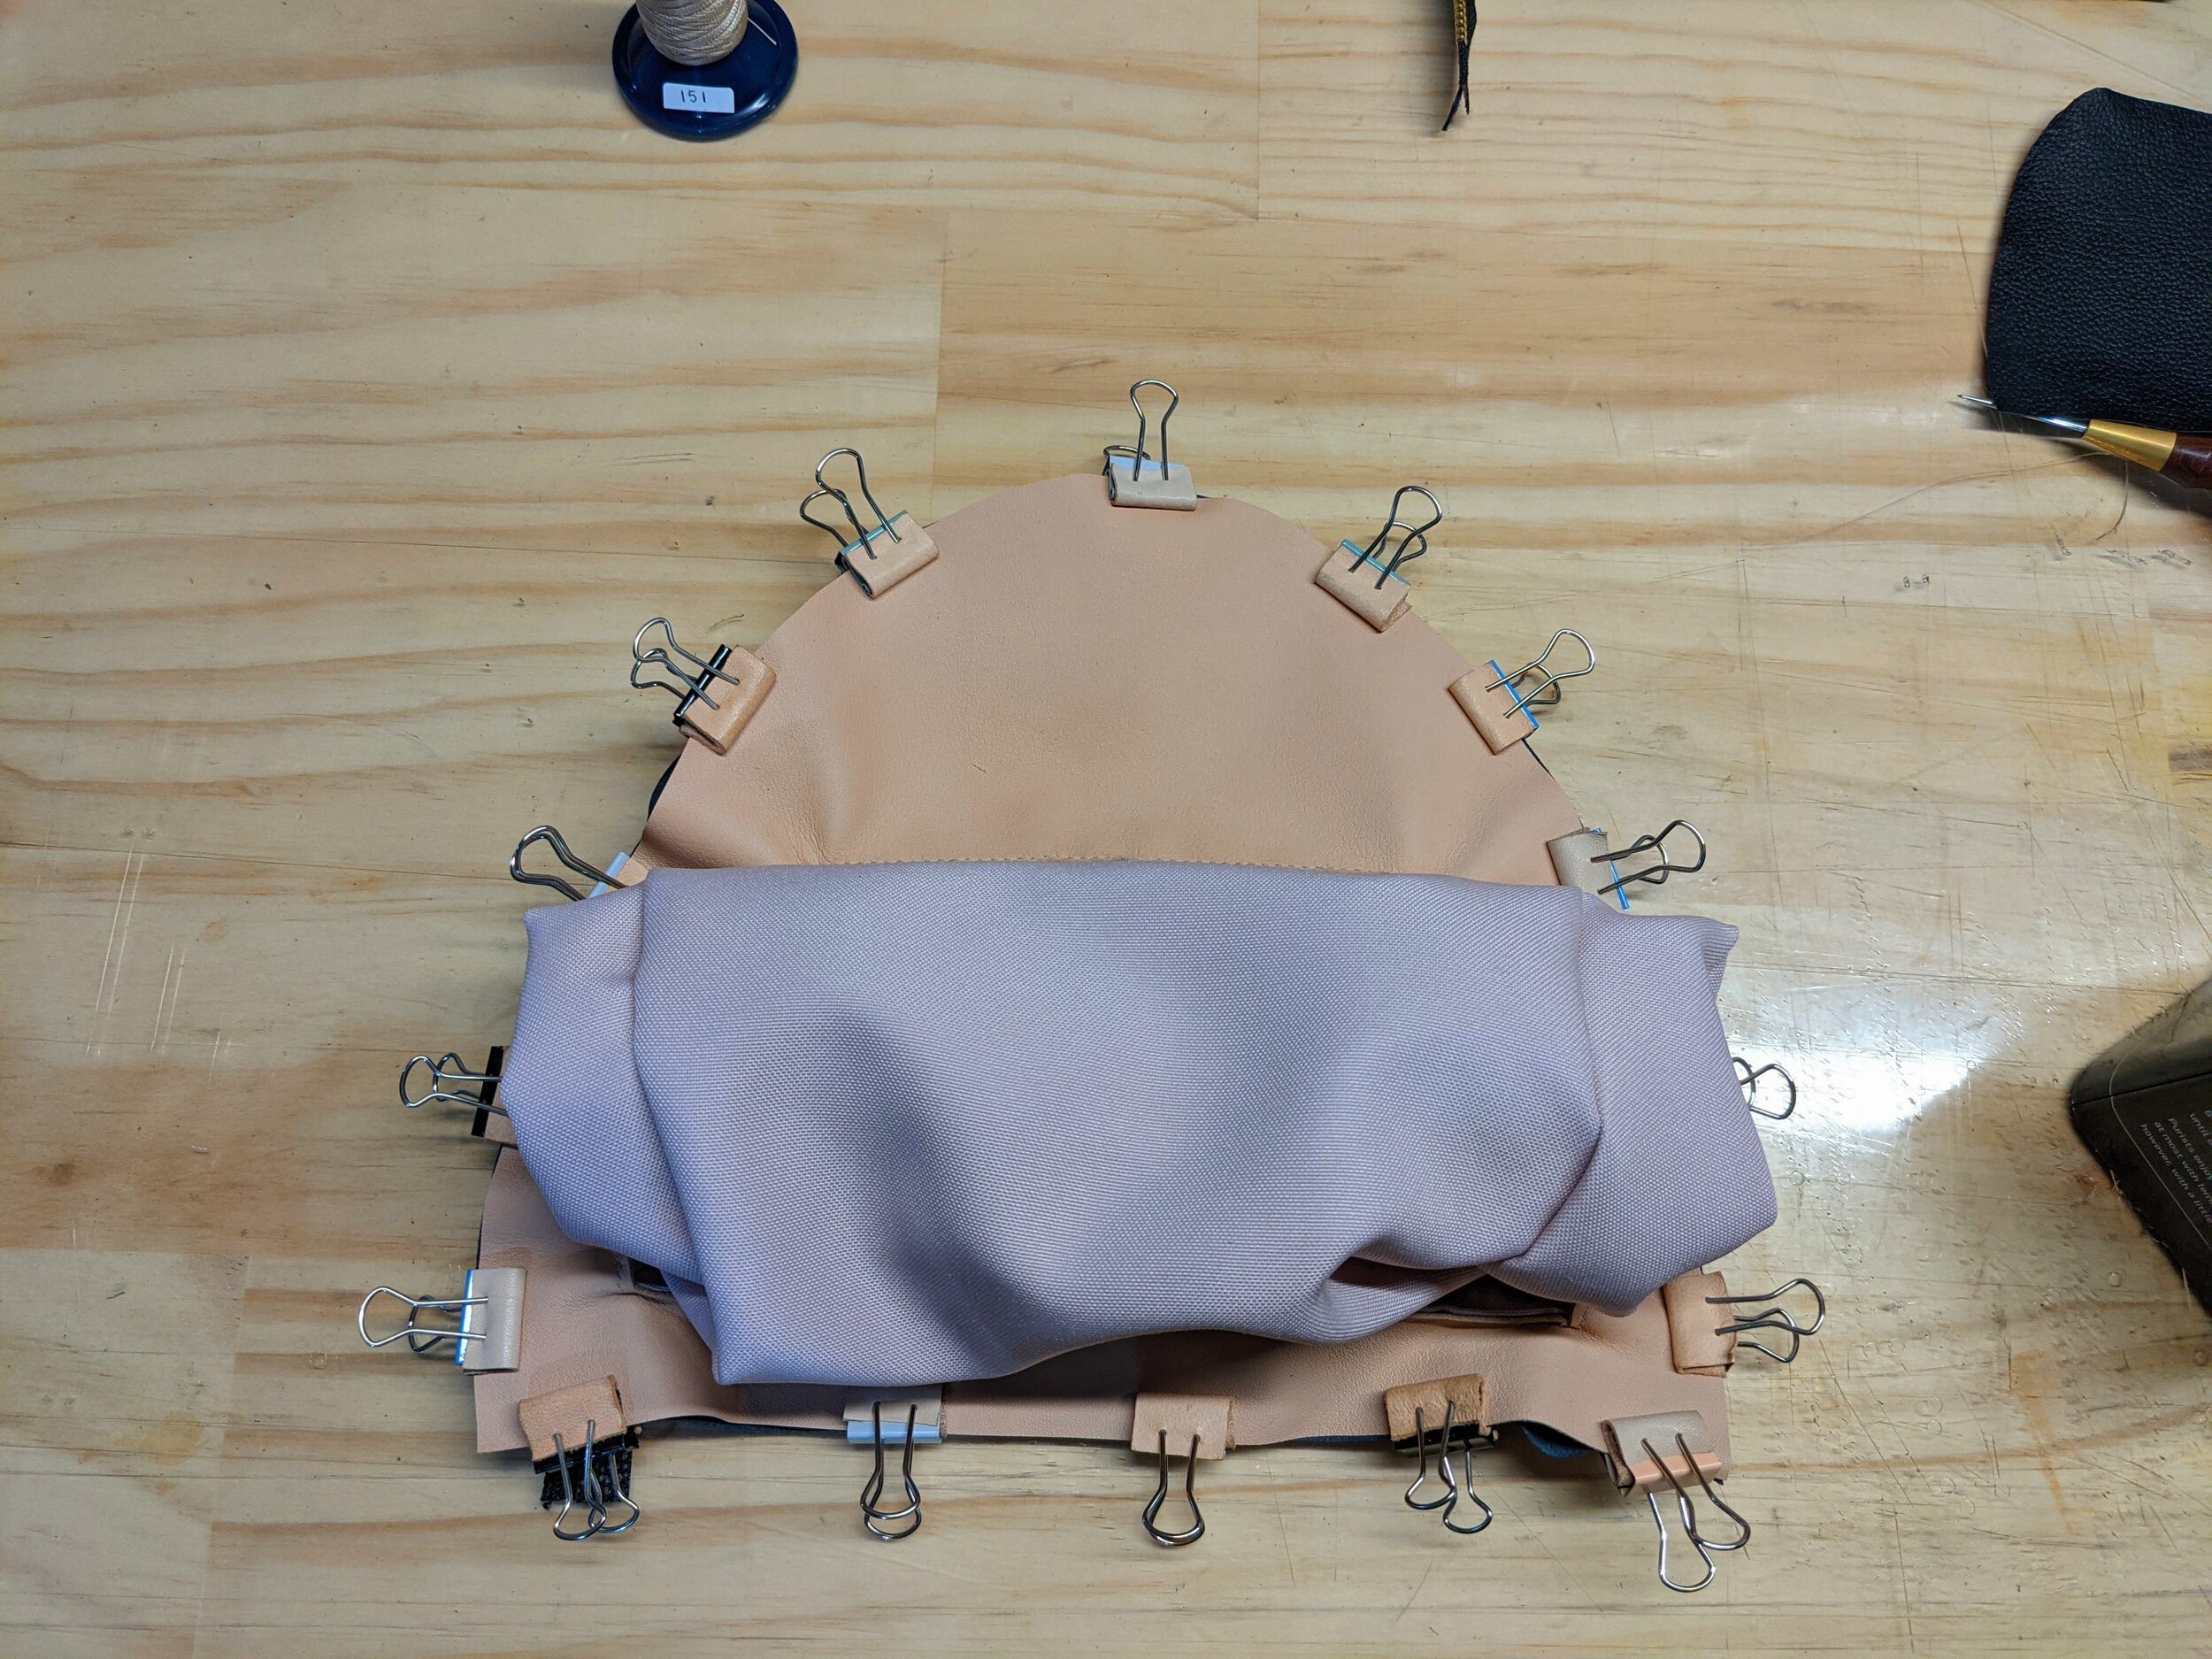
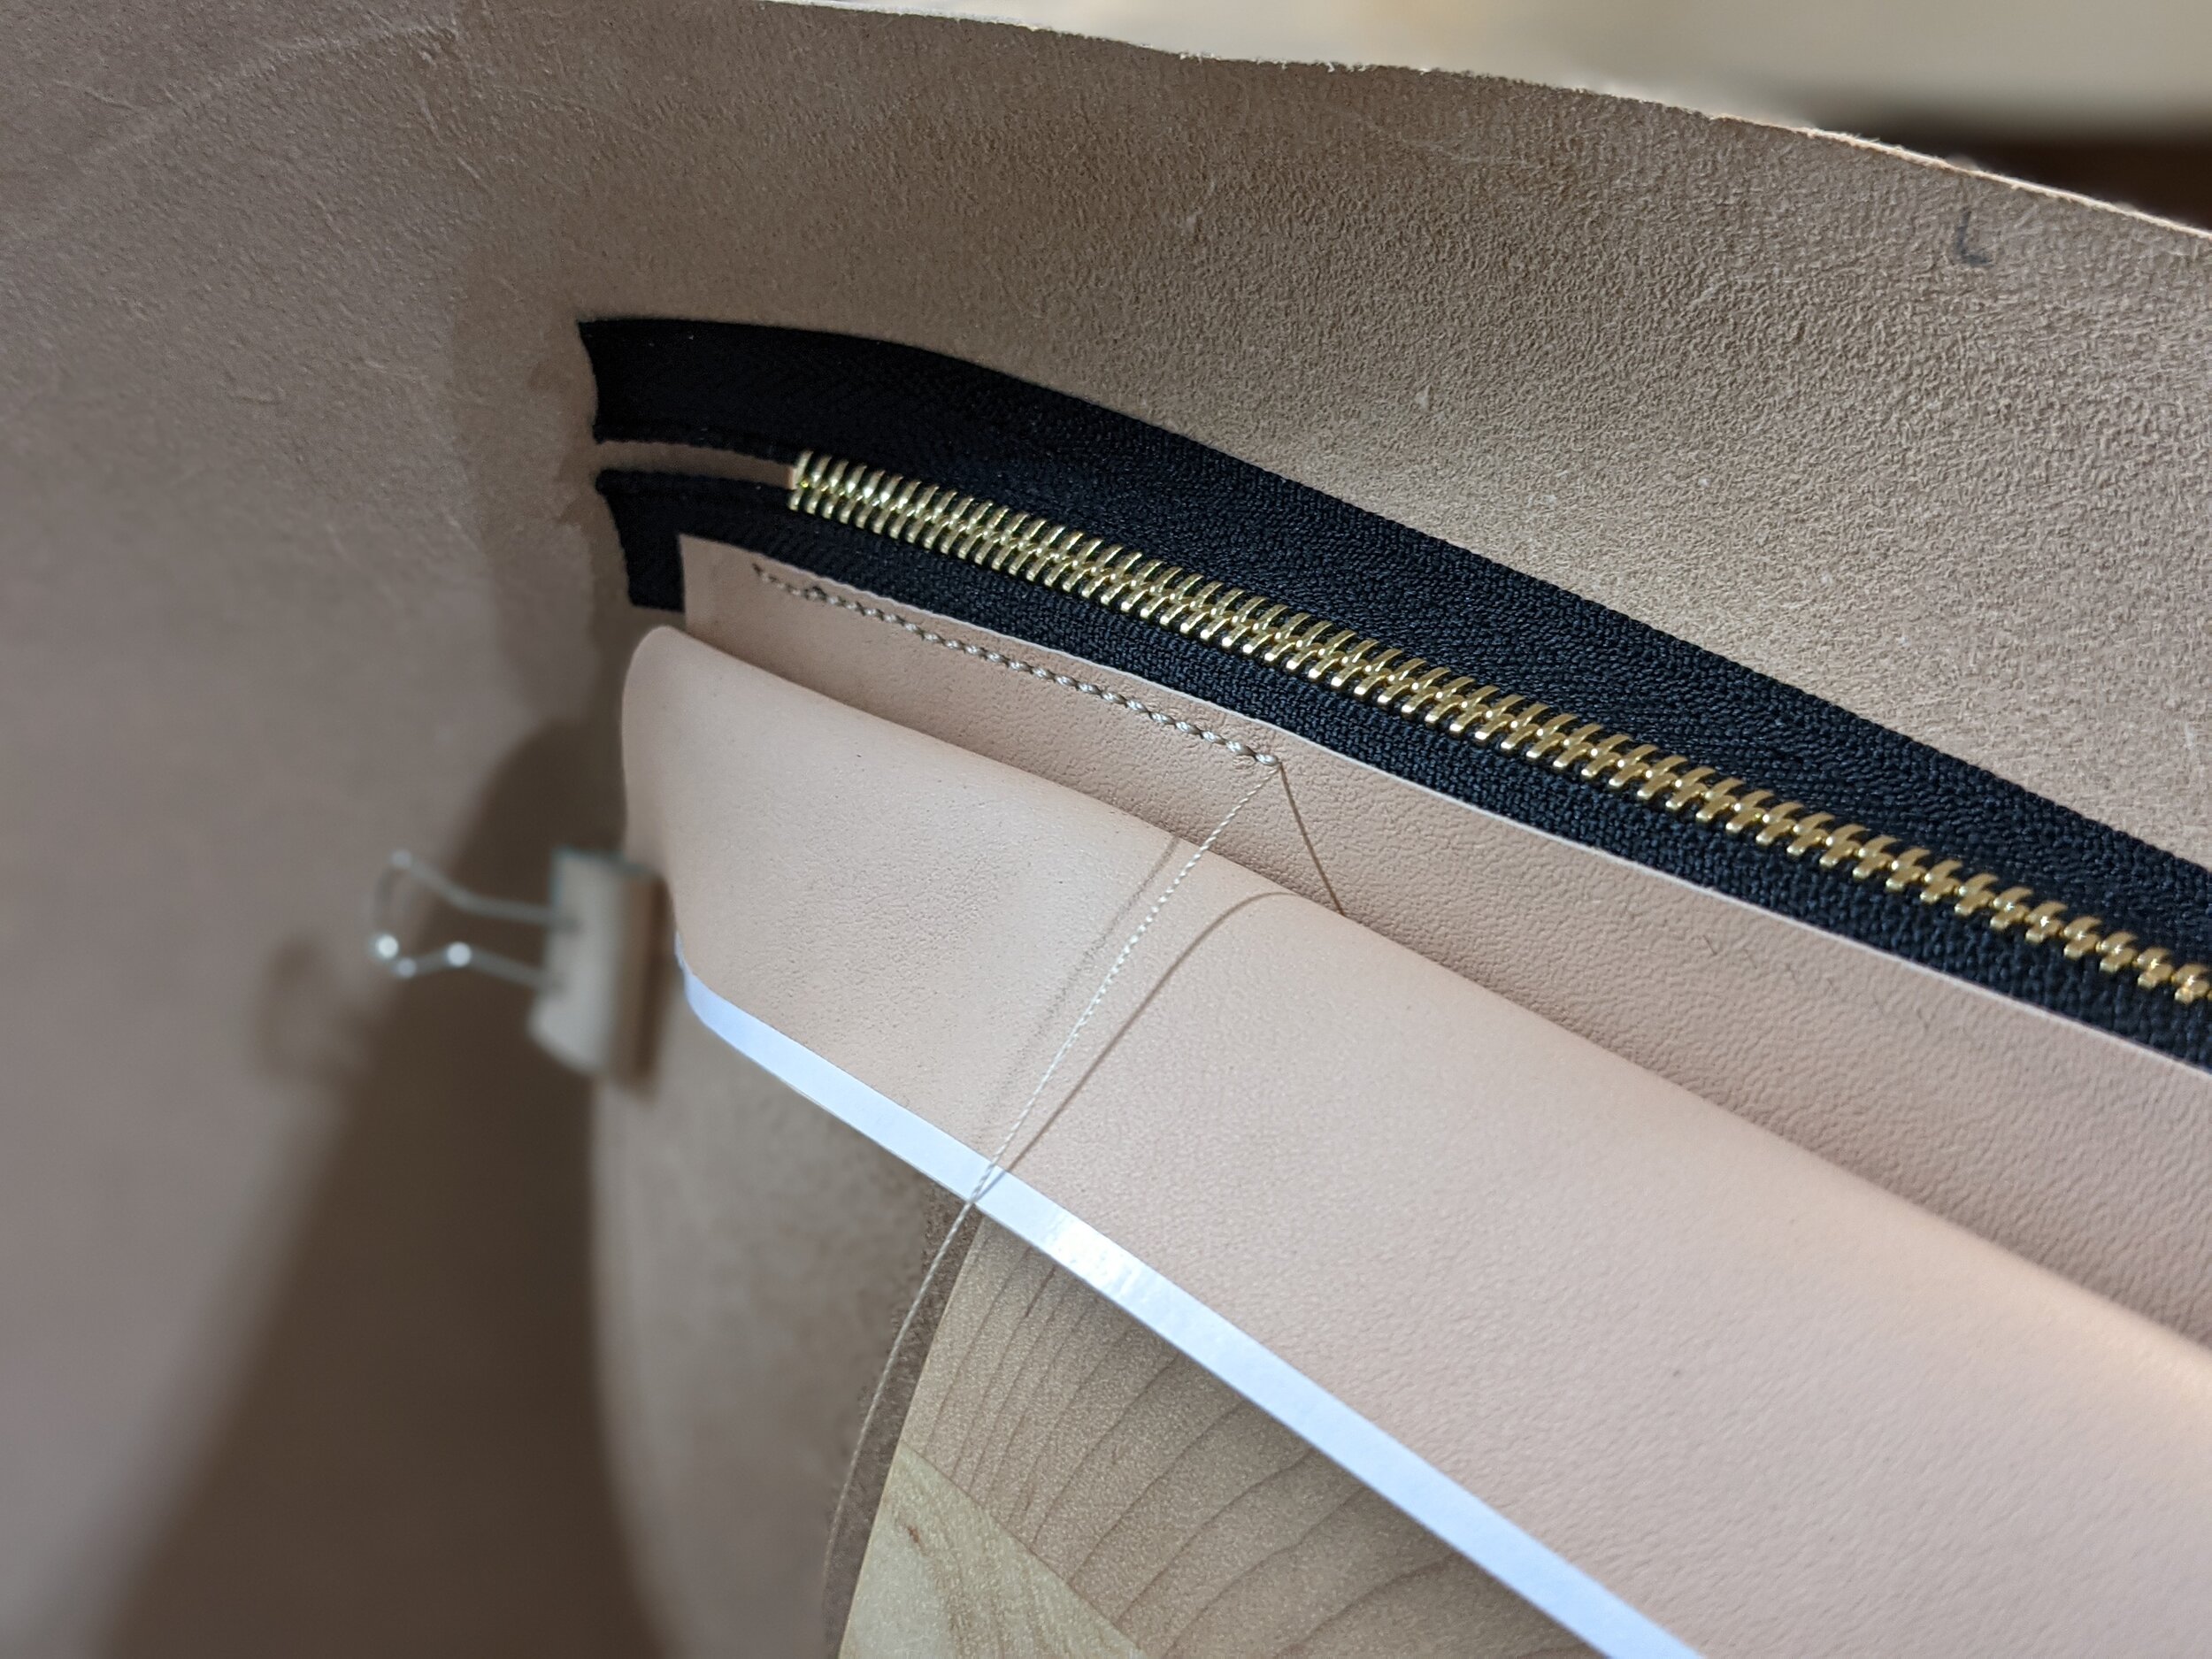
Liner
I glued and stitched the bag body panels to the base. Then I clipped one edge of my liner leather to one top edge (near the zip). I folded the bag into its final-ish shape, smoothing the liner as I went. At the other edge I measured how much excess liner there was. In my case it was 4cm. So I lay the liner leather flat and trimmed 4cm off one side.

Determining how much excess of the liner to remove
Given how my bag body and liner aren’t just a simple tube made out of a rectangle, I needed to cut out the shape of the arcs that my D-panels make. With those done I’ll angle skive all the way around the perimeter. I’ll do 1cm at the zips, and 2cm down the sides.
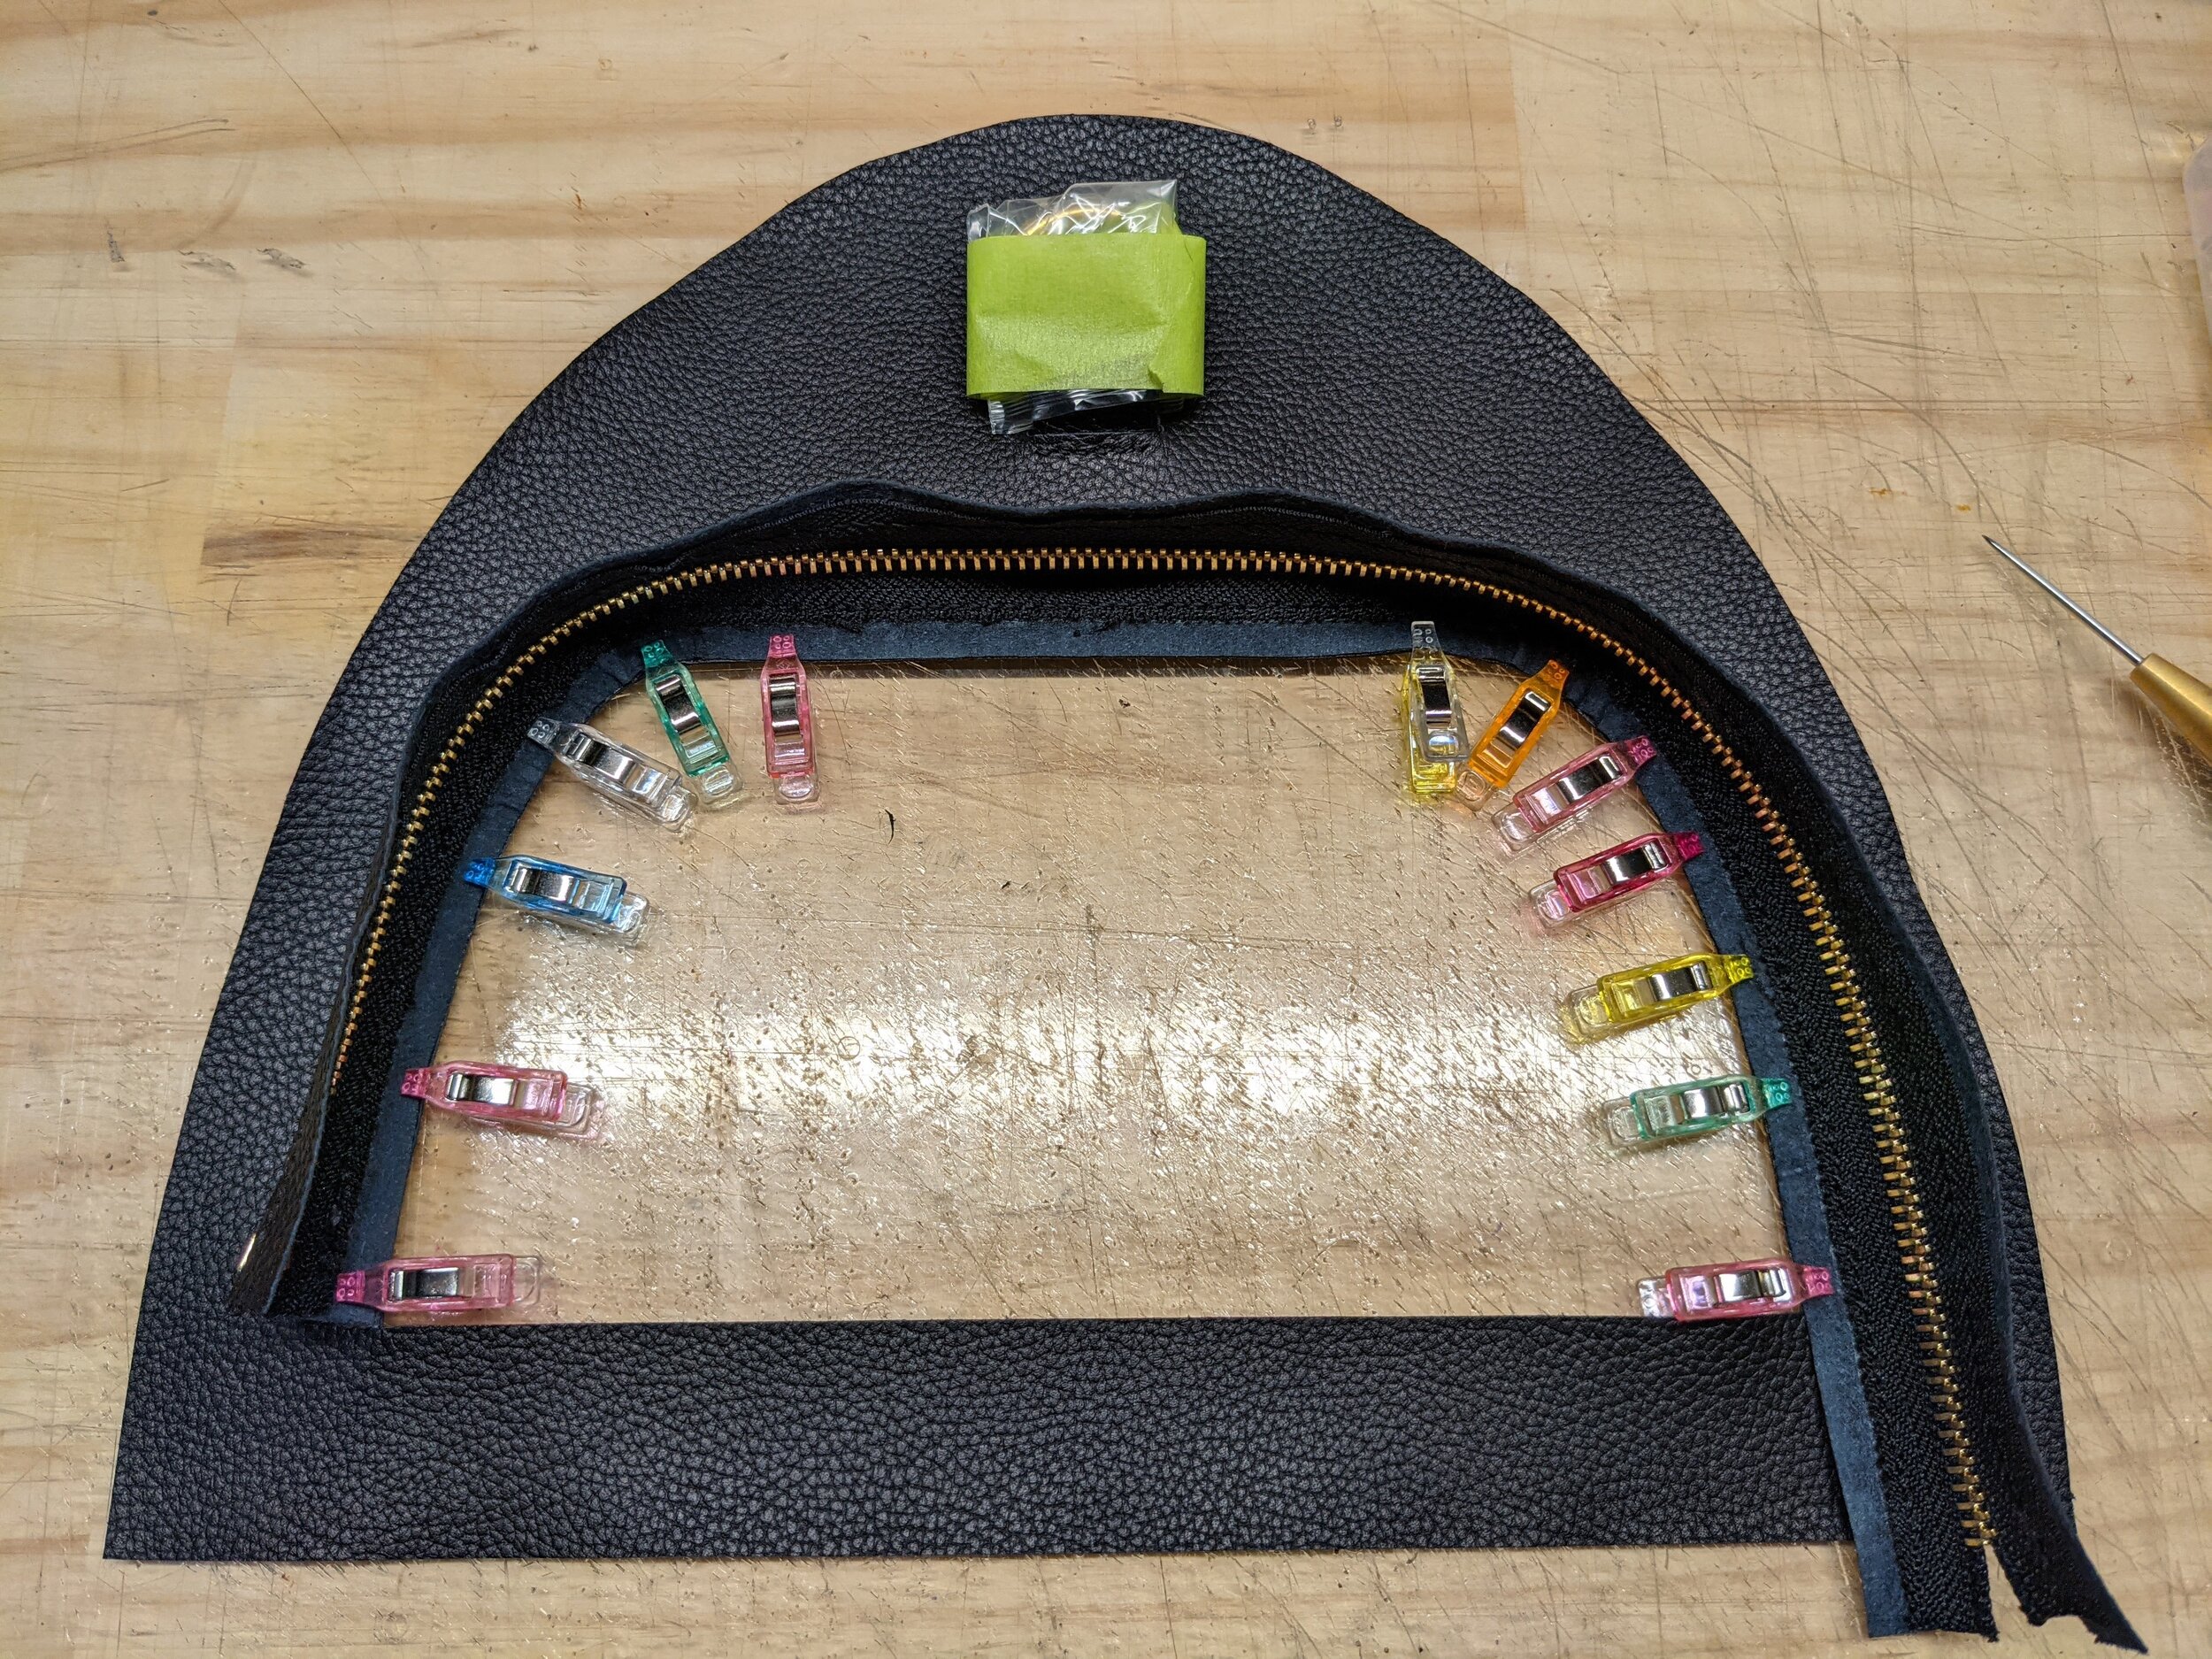
Before attaching the liner I needed to add internal pockets. I only made a single zip pocket approximately as wide as the enchape strips on the front, and almost the full height of the bag. I drew a rectangle the size of the opening, and cut a zipper to the correct size for it. Then I made the pocket piece. Using a single piece with a fold will just add bulk so my recommendation is to use two pieces and stitch them on three sides. I skived a 1cm taper skive all the way around the pieces, then glued them together. I stitched up the sides less 1cm from the top edge (this is so that there is enough room for the back layer of the pocket to be pulled out of the way when stitching down the top layer of the pocket to the zip).

Pocket insert cut to size and glued
Pocket bottom being stitched
Lastly I made some piping and attached it around the perimeter. The piping final width was around 28mm at 0.5mm thickness, and I put a strip of reinforcement tape down the middle. The cord was 2mm. I punched holes through the piping and side panel using 4mm round dents.

Piping reinforced

Piping cord glued

Piping closed and creased
Final Assembly
I glued the liner at a fold just at the edges to the outer leather. This is to ensure that the liner isn’t baggy once the bag is finished and turned. I then stitched the liner to the zip.
The hardest part was gluing the bag outer, face down, to the piping on the side panels. My side panels’ length was longer than my bag panel length so I needed to do a bit of easing by gluing parts of the side panel at a curve.
I fed through the zipper pull before closing off the end of the zipper. With it all glued it was time to stitch. The holes from the piping punching are a guide to awl through to the bag body layers, so I awled as I stitched. I used M40 meisi thread for the stitching, it’s a bit thicker than my vinymo mbt #8 and I felt was better for the job.

Weekender stitched up
Once both sides were stitched I turned the bag. The opening of the bag was quite small, and this was no easy feat, then again turning a bag is hardly ever an easy thing.
Straps and Zipper pulls
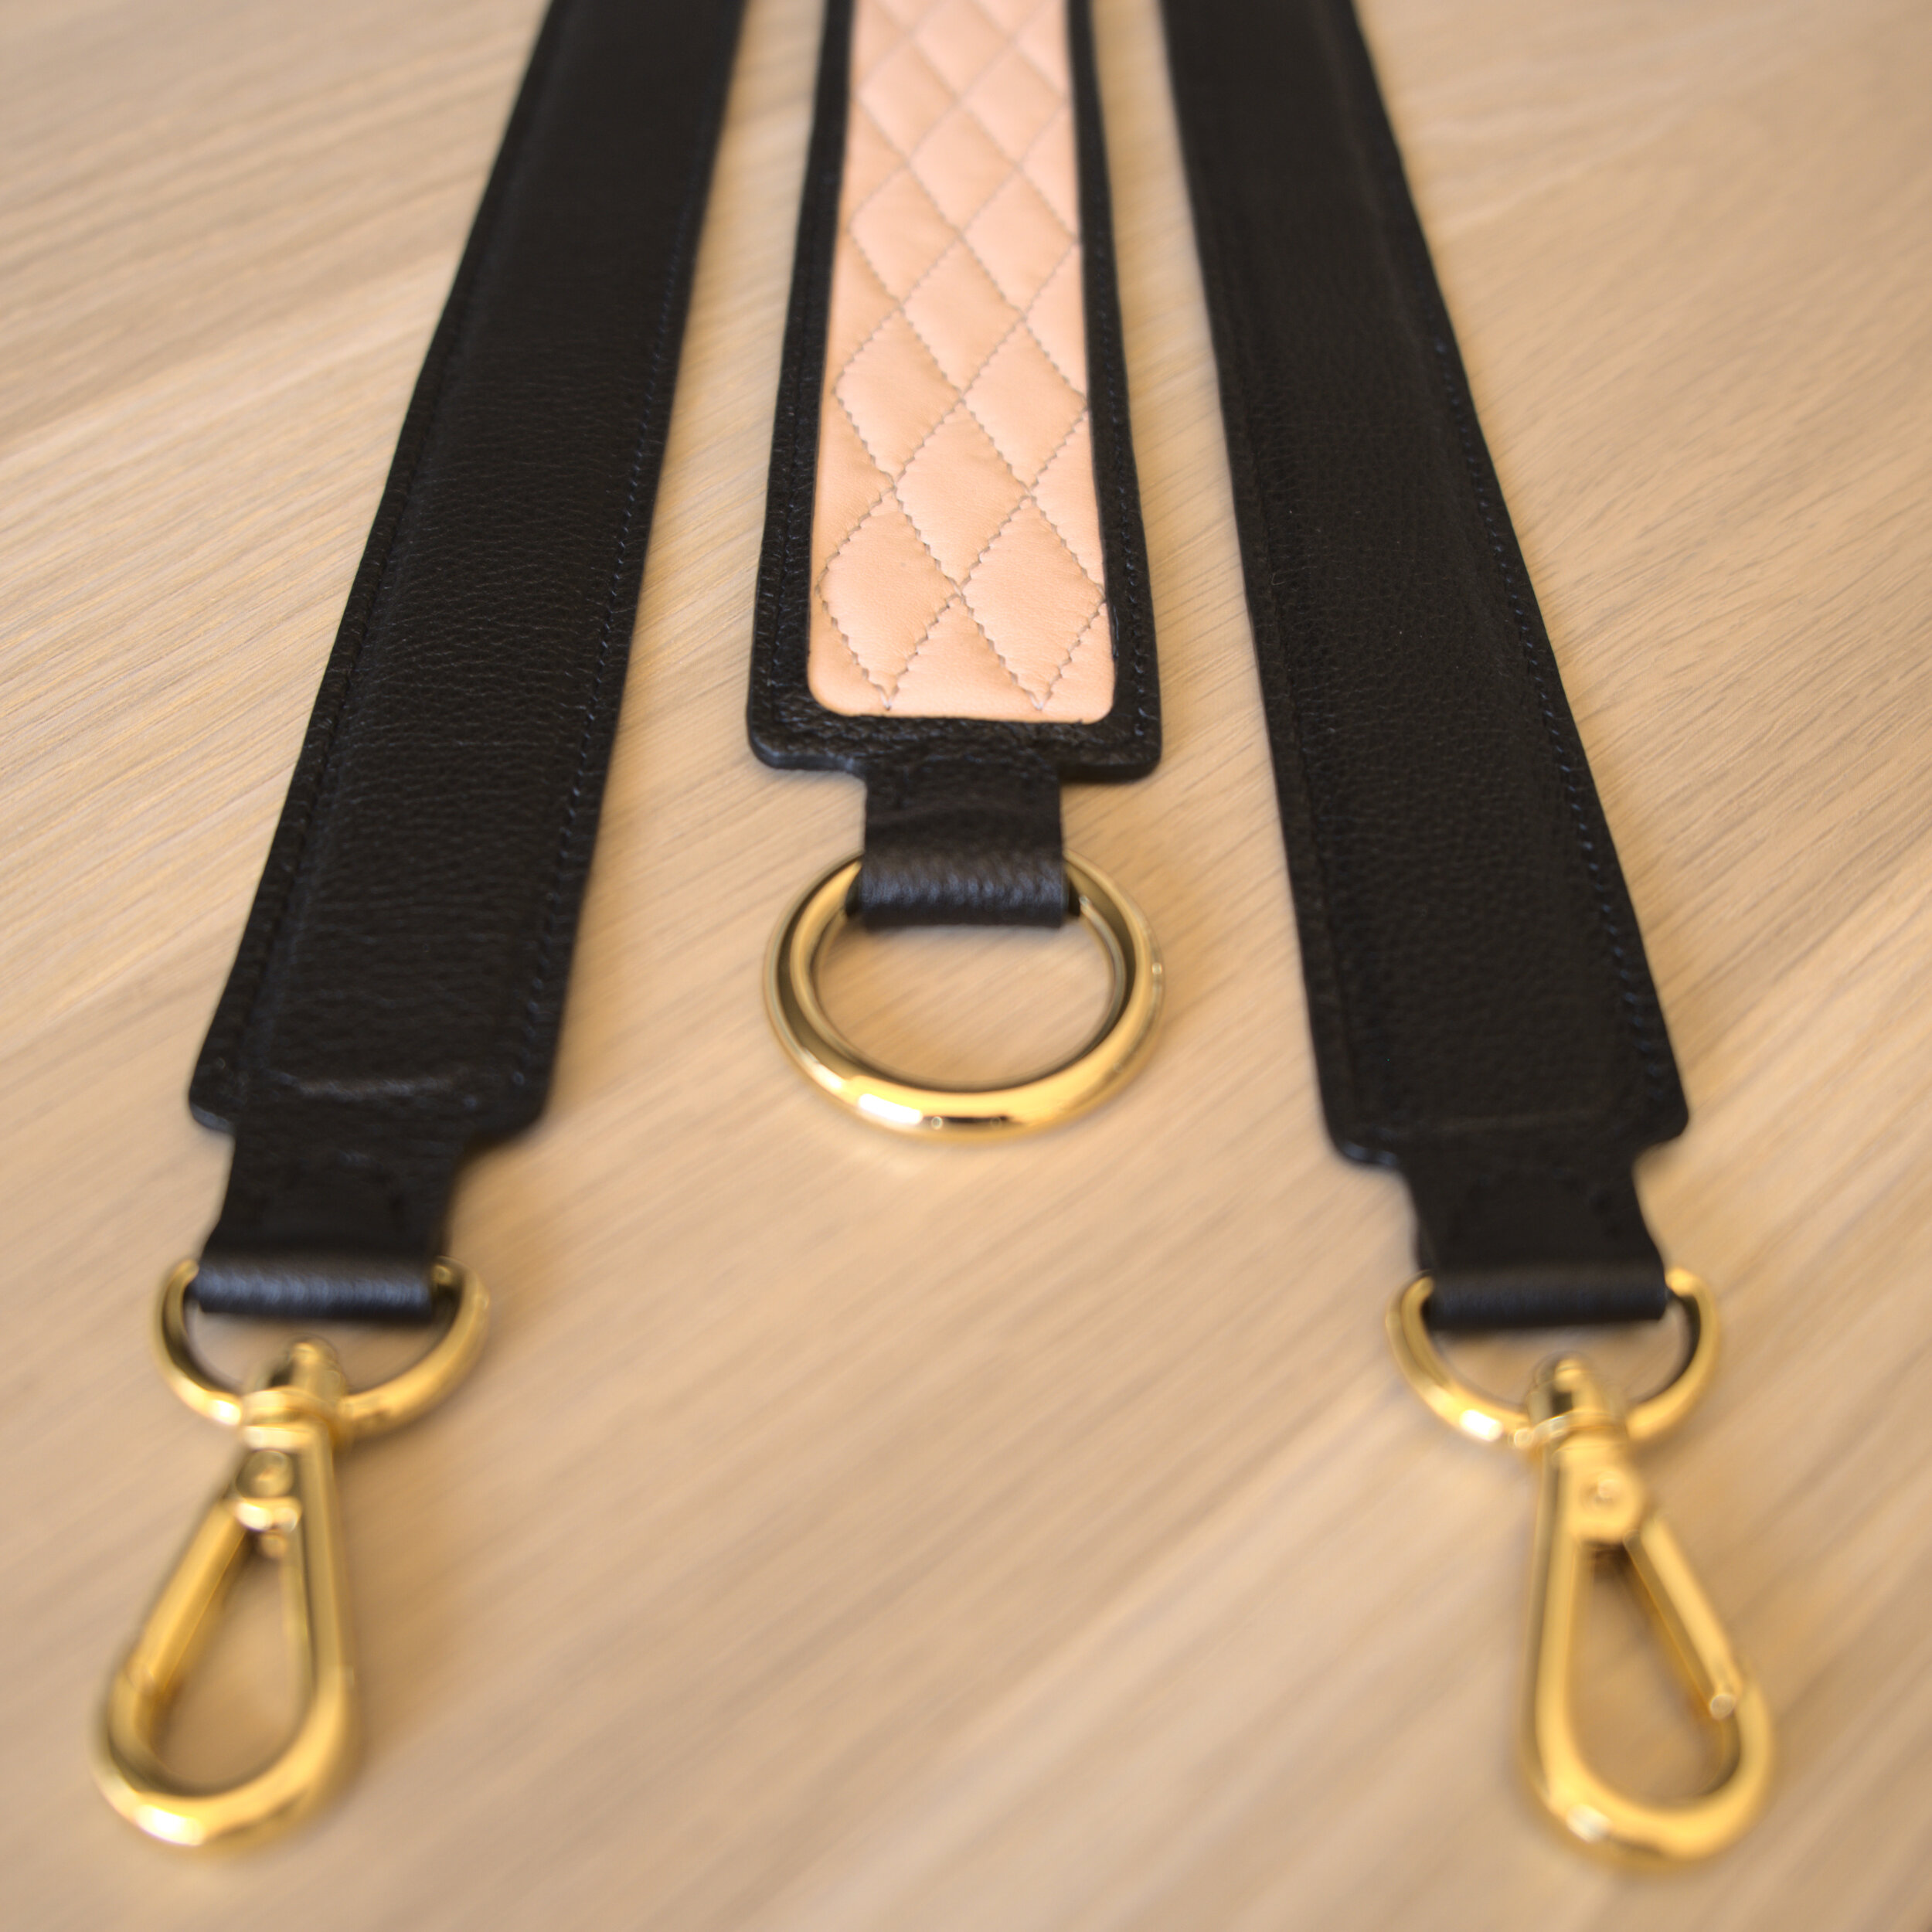
The last little bit left to do, which could’ve been done at any point in the project, is making the straps and zipper pulls.
I wanted to make a convertible strap thing that could be used as two carry handles as well as a cross-body strap.